
I went into this project with a lot of misconceptions and limited expectations. As I said in the first article, in all these years I had never tackled a project as daunting as building a custom loop. This build was not about a ‘need’ or even a ‘want’, really. The entire undertaking was about a simple desire to experience, at least once, this build of a PC.
Before I get into my conclusions let’s talk about the results. The goal of the build was to achieve a near silent system when under full gaming load, even with some overclocking.
To test, I started the system up and measured the sound within one foot of the finished build. I did this using a phone app to measure noise levels. I then fired up 3D Mark, selected the Fire Strike Extreme demo and let it run looped for about an hour. I then measured the noise level again, from the same location. The difference was an increase in sound produced of 2 decibels. In the grand scheme of things this makes the system more-or-less silent under load. Goal one achieved!
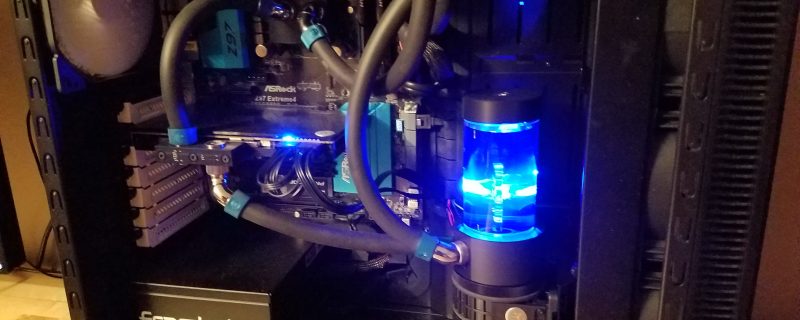
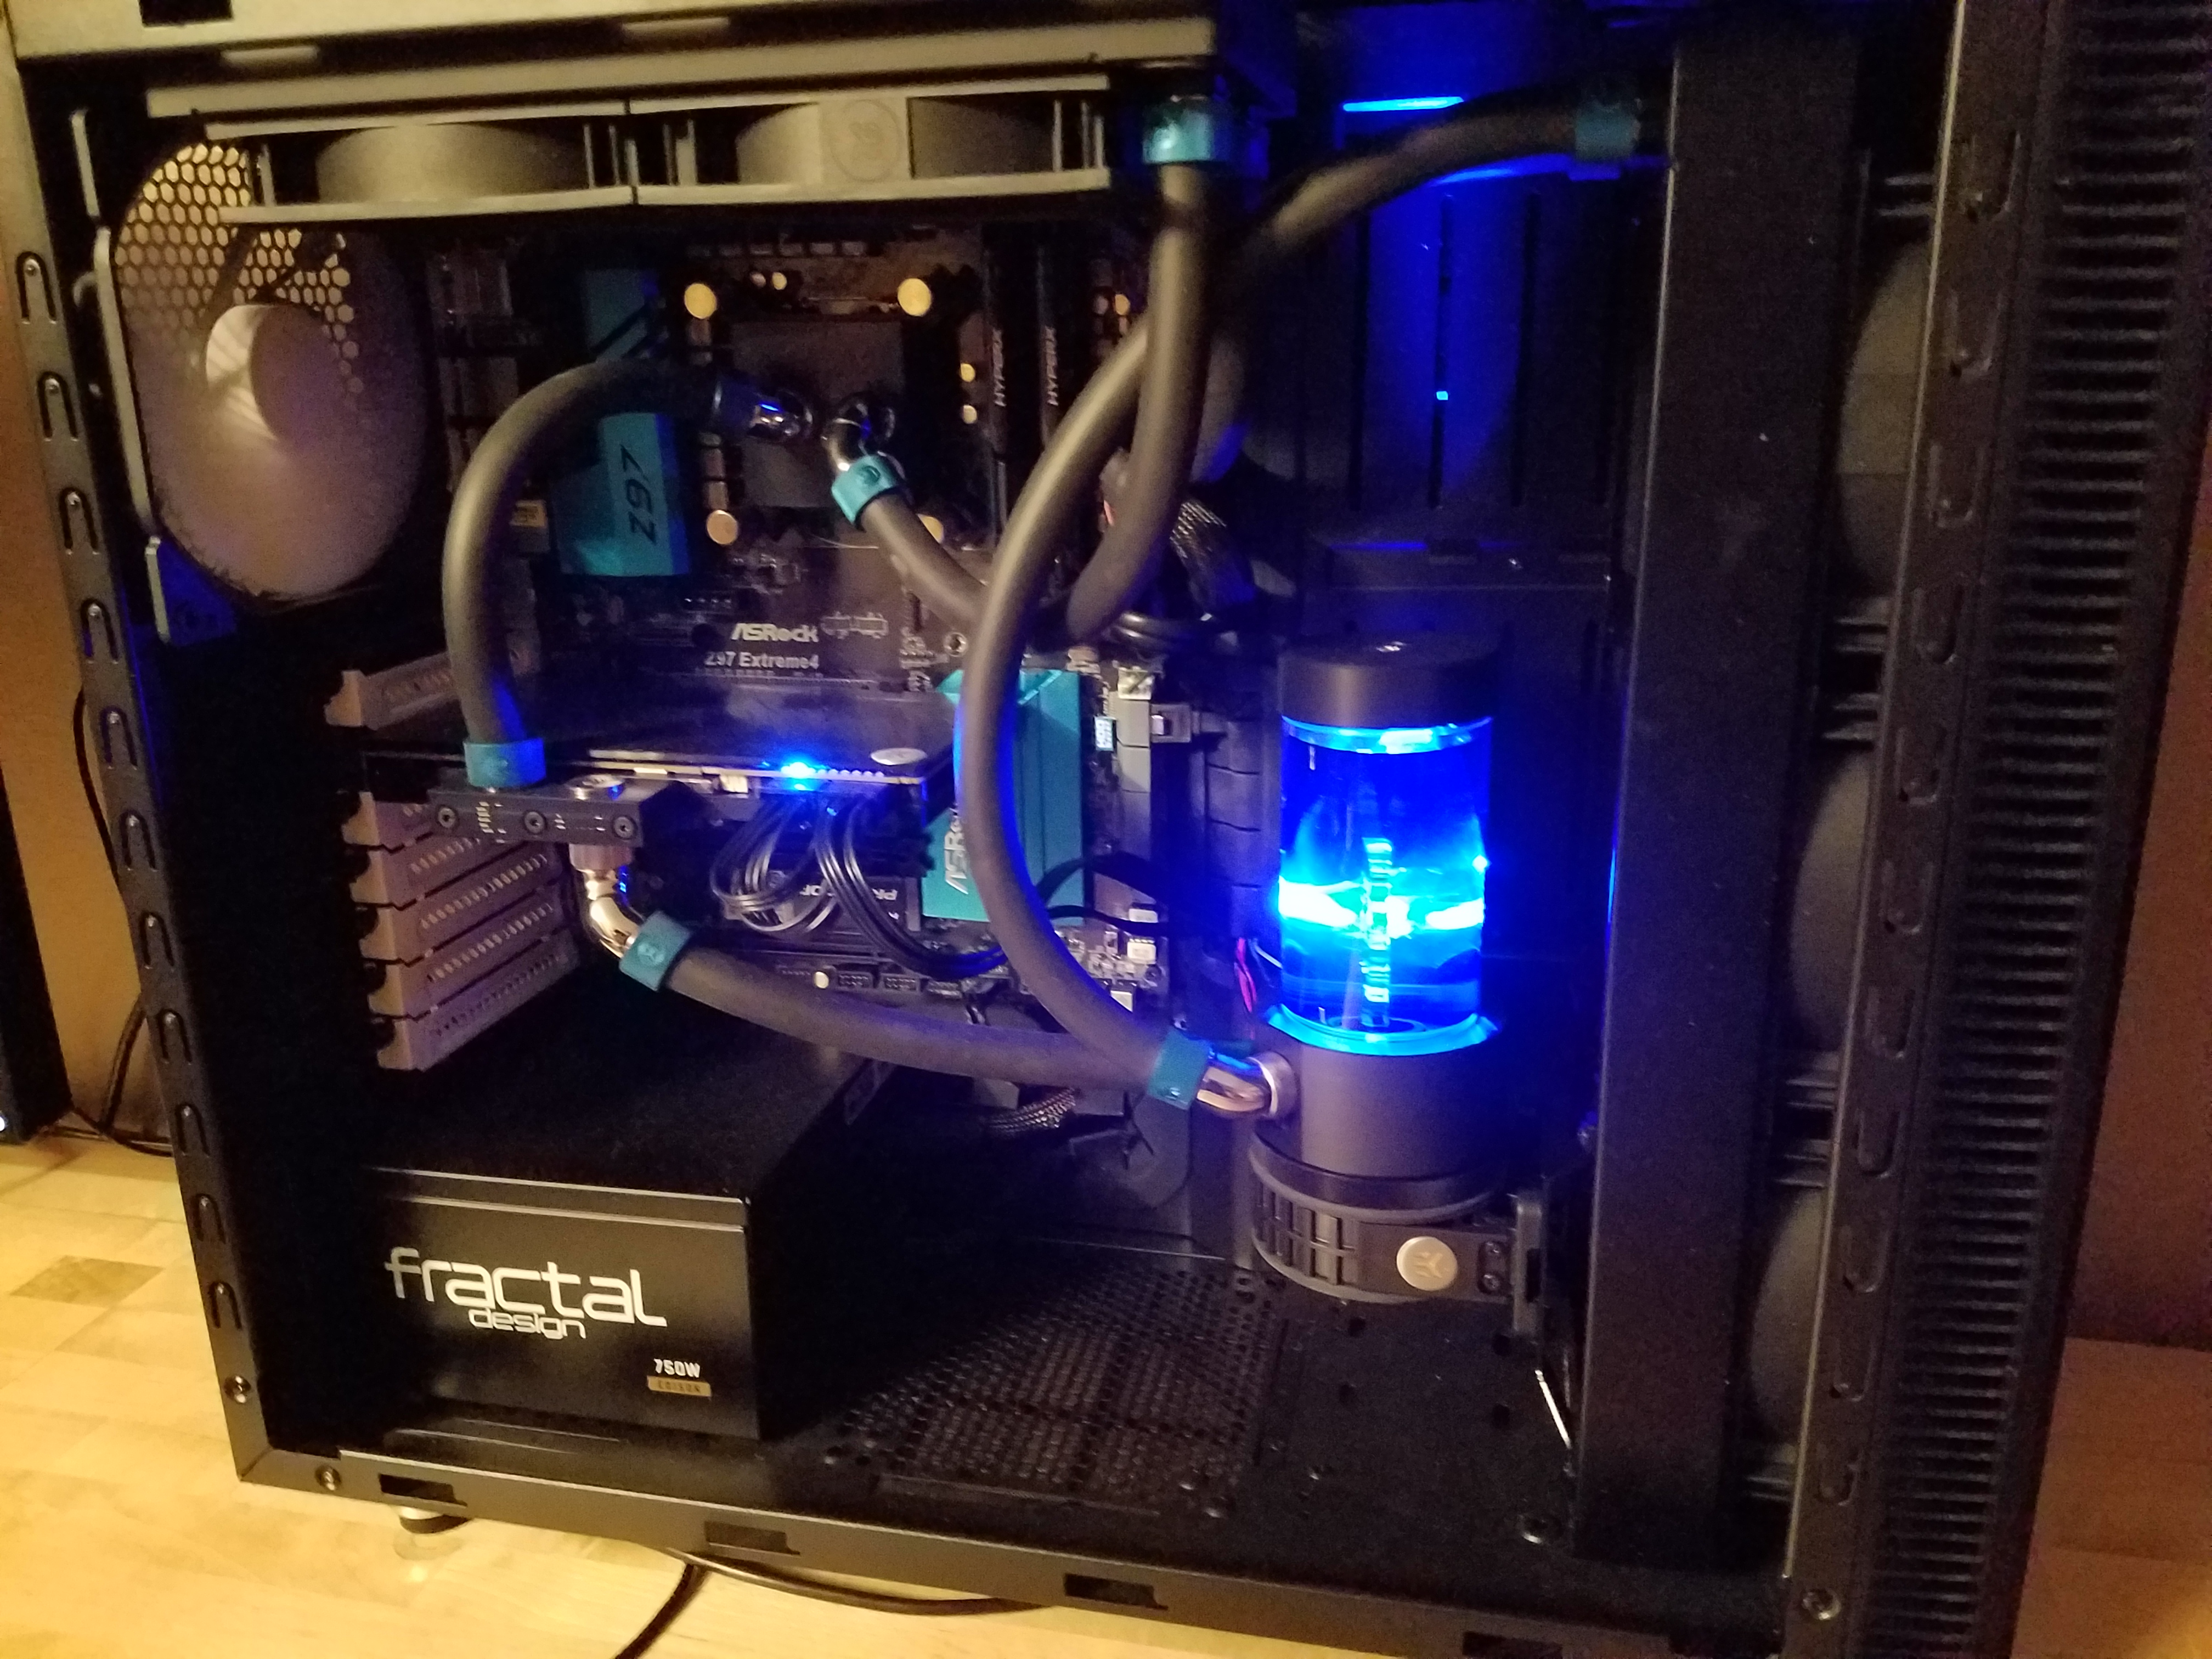
For those who are wondering, I have all 6 of the fans in the case running off the CPU header and am using a large PWM splitter to ensure they are all controlled correctly. I then set the CPU fan in the BIOS to silent operation. I ran the pump off an additional fan header and then set up a custom profile in the BIOS with the pump running at 50% until temperatures on the CPU exceeded 60C when the pump would slowly be ramped up.

Speaking of fans and temps, the temperatures were a bit of a surprise for me. I had thought that the CPU temps would be lower. I am running a 4770K at 4.3GHz with voltage set at 1.180. Under the Large FFT stress test in Prime95 I was seeing temps in the mid to upper 60C range. I honestly expected lower, especially when you see the GPU temps. However, under gaming loads I am really happy with the results, the CPU hovers at around 54C
The GPU temps also surprised me, but from the opposite side. Even with the Fury overclocked to 1090MHz them temps never went over 41C, at stock speeds the temps barely hit 40C. This is an amazing improvement on air cooled solutions.
So, we have reached our destination, achieving a near-silent gaming solution with some nice overclocking. The system is stable, fast, cool and quiet. However, the destination, while satisfying, was not the point here, but rather the journey.
Custom liquid cooling is something we see pushed a lot in the PC enthusiast world. Pretty much every mod and most YouTubers swear by it. When I see the results the appeal is easy to acknowledge.
The thing is, however, the majority of us will never need this type of setup. Air cooling and traditional builds get results. Granted, they might not have the bragging rights of a custom loop but they are still impressive. My Arc Mini gaming rig was essentially the same build and was almost as quiet, well at least to my ears. The temps might not have been as spectacular but were always well away from being an issue.
Custom loops actually have a limited practical appeal at the end of the day. If you love to tinker and build for the joy of the build, then this can be a lot of fun. If you want to push massive overclocks, then this is also a way to get your kicks. Similarly, if you’re using a computer in a room with a LOT of heat and need to keep it cool, then this is your option. Outside of these reasons I have hard time understanding why anyone would feel the need to do this other than to just say they did.
Having said all that, if you ARE planning to do it, here are some of the things a liquid cooling novice, but experienced PC builder, picked up.
Plan your loop well in advance. I know you’re going to say everyone knows that. Well, not the way I mean. The loop itself is the easy part, however, in order to make your life easy, there are two specific parts of the loop you need to make sure are set at very specific locations.
The first is your fill port; you need this to be high in the build and easy to access. This might sound like a no brainer but I have looked at a lot of builds and am surprised how many “experienced” builders made the same mistake I did and positioned the fill port badly.
Next plan for your drain. This is something else I seldom see the so-called experts really talk about. A custom loop will need maintenance (more on that coming up) and this means draining the system occasionally. Make sure you plan to have a valve in the build and put it at the lowest point possible in the loop. In this way you should be able to drain most of the fluid without the contortions involved in tilting the build around.
As for the rest of the loop, well that is the easy part, at least it is with flexible tubing. The hard tubing builders have my respect, as I now understand the absolute pain-in-the-ass their builds are to work with. While the elite might like to show off their hard tubing, for the rest of us I suggest staying with flexible. Sooner or later you’re going to have an issue. Something will need to be replaced and moved for just a moment. Flexible tubing makes that easy. Need to change a CPU, no problem, pull off the water block and set it aside and reattach. Hard tubing means you have to drain and disconnect to do the same task.
Placement and order in the loop also seems to have little impact. Do you put your CPU or GPU in the loop first? Do you put a radiator between the components? Quit worrying about it, the impact is minimal at MOST. The laws of Thermo-dynamics in fluids show us that within a closed loop such as this, the fluid will, by its nature, tend to equalize the temperature throughout the entire system. This means the difference between the fluid at its coolest and warmest is likely only to be a degree or two. So the direction and order of the flow will have no real impact on the temperatures you will experience.

Now, I mentioned above that I would talk more about maintenance. It seems that I am always hearing people talk about the issue of maintenance when it comes to custom loops. While there is more to it than traditional builds, you might be surprised at how little is really needed.
The first part of this is fluid changing; How often do you do this? I mean let’s face it, draining the system is a bit of a chore and we built the system to use it, not to work on it all the time – well some of us did. I was surprised to learn that for most of us the fluid can go for one to two years without needing to be replaced. There are obviously some variables to take into account here, but on the whole this seems to be what most people should consider for a replacement schedule.
The main variables that you should bear in mind start first with construction. If I am reading between the lines correctly from the various conversations I have had with experts over the last few weeks, every company uses a slightly different method and materials in making their components. Sometimes these materials mixed with different coolants can cause chemical reactions that breakdown the coolant faster. The solution seems to be to make sure you get all your components from the same manufacturer as your coolant. Now, to be clear, I am not suggesting that this is ‘gospel’, but the discussions I had pointed in this direction.
On the subject of coolants, for the most maintenance-free life, do not use a coolant with dyes. I know we all want that cool look – the funky lights can add a nice finishing touch to that awesome build we spent so much time putting together. Well, the dyes might look pretty spaced out but they also tend to die out over time. (See my play on words there.)
Over time, even the best pre-mix solutions will break down chemically. The first bonds likely to fail are in the dyes. As they separate they will clog the water blocks and radiators. Clear solutions may not be as pretty but they tend to have a longer life and that means less maintenance.
Another issue with dyes is the lighting. A UV reactive dye with a small UV light creates a really impressive glow effect in your system. However, the UV light reactions with the dye also cause the bonds to break more quickly with the solution, which then separates, clogging blocks and making a general mess of your loop. In other words, using a UV lit system means changing your fluid more often to prevent larger issues.
So, now we have come to the end of our journey and the destination has been reached, allow me give you my parting thoughts.
As a PC Hardware enthusiast this was a great build experience. I was doing something I had never tried and got to spend about 5 hours with my best friend building a PC, drinking, laughing, and just generally having fun. The amazing cooling and silent operation we achieved at the end was incredible. However, while this is my first, it is also likely to be my last custom-loop build.
I see the appeal; I really do. But I am not sure I find it strong enough to overcome the down sides. I did think about listing all the negatives but I did not want this to come across as a do-not-do-this-build type article. If you want to try this experience once, and I suggest every hardware enthusiast do it at least once, then you should jump in.
Let me take a moment to thank EKWB, they have been AWESOME supporting this project and the quality of the parts they sent was outstanding! If I ever have the occasion to do this again they will be my first stop. Also thank you to Fractal Designs for the Define S case, this is a great case at a reasonable price for a liquid cooling build. Also a thank you to Kingston for the HyperX Memory and SSDs we used.
If any of you decide to do a custom loop build for the first time or have some questions from my experience, please feel free to comment on the article. Now I am going to go fire up some Fallout on my new rig. Until next time, GAME ON!