
A 144-Hz gaming display, a high-end gaming mouse and 200 frames per second in Counter Strike: Global Offensive while throwing a smoke grenade? Smooth 60 fps in large-scale warfare on the Gulf of Oman in Battlefield 4 with 63 other people? Sounds a bit demanding for a computer, even in 1080p mode – to say nothing of 1440p or 4K modes. Computer performance is always welcome when you’re playing your favorite titles, and even more so when you’re broadcasting your gaming skills to Twitch or YouTube. The latest hot PC titles can leave you—and your hardware—more red in the face than you’d ever have thought.
Upgrading your VGA card or CPU is the easiest way to increase performance – but there are also a few other steps you can consider before resorting to an upgrade.
- Overclocking your VGA
The first thing you should try is overclocking your VGA card. When overclocking AMD Radeon cards, two tools are all you’ll need: the Sapphire Trixx application (http://www.sapphiretech.com/catapage_tech.asp?cataid=291&lang=eng) and the ATITool 0.26 (https://www.techpowerup.com/downloads/436/atitool-0-26). While the latter may be outdated, trust me – it can be surprisingly useful for rough assessment VGA overclocking.
How to go about it: Close all your work and other background applications such as IM’s (because there is a risk this will crash your computer and damage files). Launch the ATITool then click “Show 3D view button” and “Scan for artifacts”. You should see a rotating square.
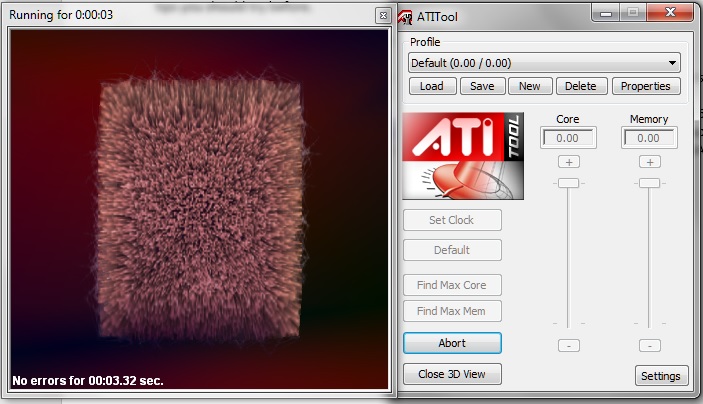
In the bottom left corner you’ll see the message “No errors for X sec.”. It’s essential that there should be no errors for about 5 minutes.
Now launch SAPPHIRE TriXX.
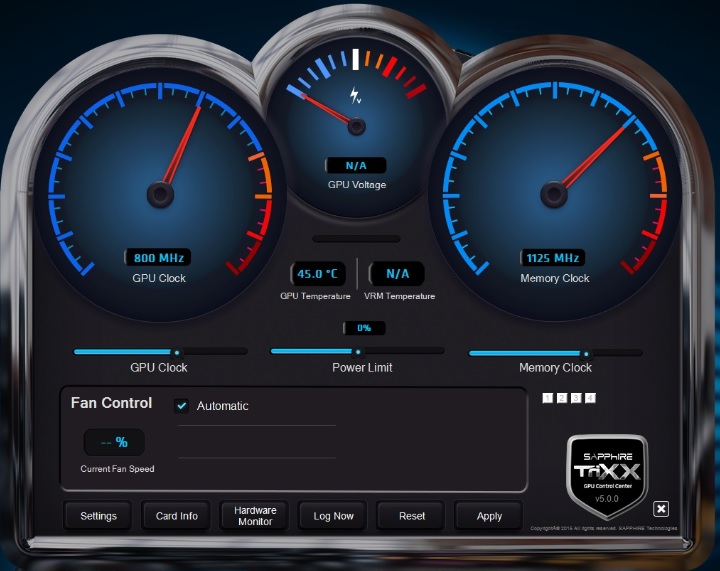
You will next see three big sliders. For the first, run the “Power Limit” to its maximum value. Then increase the left slider “GPU Clock” by 20 MHz and wait for 1-2 minutes without errors in the ATITool. Now take it up step by step… When the GPU Clock is too high you’ll see errors in the ATITool (most commonly, yellow strokes or dots) take 2 steps back (decrease the GPU clock by 40 MHz) and close the ATITool.
Now launch your favorite game (ideally, a demanding FPP or TPP one), and set the details on a High or Ultra level. Load a savegame and stay in one place for about 3 minutes, then look carefully at the textures and reflections on the screen. If they are all displayed without errors (red or green glitches, for example), try gaming for 15 minutes. If your PC crashes, decrease the GPU clock by another 20 MHz steps. If everything is all right, quit the game and launch the ATITool and TriXX again.
Now increase the right slider “Memory clock” in the same steps – by 20 MHz. As you did before, wait for 1-2 minutes without errors in the ATITool and then proceed forward. The only difference here will be that some memory errors are invisible for the ATITool – so look carefully for any artifacts. When either the ATITool or you recognize any artifacts, decrease the memory clock by 60 MHz and again try your favorite game – like you did while overclocking the GPU. The safety margin for memory should be greater than for the GPU – because the ATITool uses only a small amount of the VGA card’s memory.
When you find your maximum stable settings you can store them in overclocking profiles (the buttons below the memory clock slider).
With most VGA cards you can also increase the “GPU Voltage” – a small slider between the “GPU clock” and the “Memory clock” sliders. You can try it in 25 mV steps if your card has a high-end cooling solution (for example the SAPPHIRE Nitro, Vapor-X or Tri-X) but there is a risk you’ll damage your card. This operation is not recommended for reference design AMD cards.
- Overclocking your CPU
Your machine’s CPU is also an essential component, not only for gaming, but for daily tasks, too. In gaming, however, it’s a crucial factor both when you’re using a 144-Hz gaming LCD or looking to buy VR systems like Oculus Rift or HTC Vive. Unfortunately, CPU overclocking is more difficult than VGA overclocking and, to further complicate matters, procedures are different for AMD and Intel CPUs. I recommend detailed CPU overclocking guides from the http://overclocking.guide website:
- For AMD FM2 CPUs, http://overclocking.guide/amd-trinity-richland-kaveri-socket-fm2/
- For Intel LGA1151 CPUs, http://overclocking.guide/category/intel-oc-guides/skylake-non-k-oc/
- For Intel LGA1150 CPUs, http://overclocking.guide/haswell-and-devils-canyon-socket-1150/
- Consider buying a capacious SSD drive (750 GB or more)
The SSD drive for OS and daily use applications is, in 2016, almost required if using your PC is to be convenient. These example videos show why:
OS Booting https://www.youtube.com/watch?v=OE5hHFVvUOo
Opening Adobe Photoshop https://www.youtube.com/watch?v=QXL-WUmRYFc
But SSD drives are today relatively cheap, and should be useful for loading up games too. For example, installing StarCraft 2 on an SSD drive can significantly decrease game loading time.
https://www.youtube.com/watch?v=hWu-ltsZaRU
You’ll be happy to know that using the SSD drive approach not only provides those better loading times, but also boosts game performance. Some 2015/2016 games like Batman: Arkham City, Grand Theft Auto 5 or latest Quantum Break perform better if they are SSD installed. Outstripping the abilities of an HDD drive, they use a ton of data and sometimes need to perform countless I/O operations per second. HDD drive installed games may suffer from annoying micro stuttering in the animation.
- Compare your PC performance with similar machines
It’s a good way to make sure that all your components turn in a respectable performance. I recommend UserBenchmark http://www.userbenchmark.com/, a simple benchmark that checks your PC’s components’ performance against an enormous results database (over 1 million uploaded scores, over 90 thousands components tested). When you’re benchmarking your PC, remember to close all background applications as they can affect your scores.
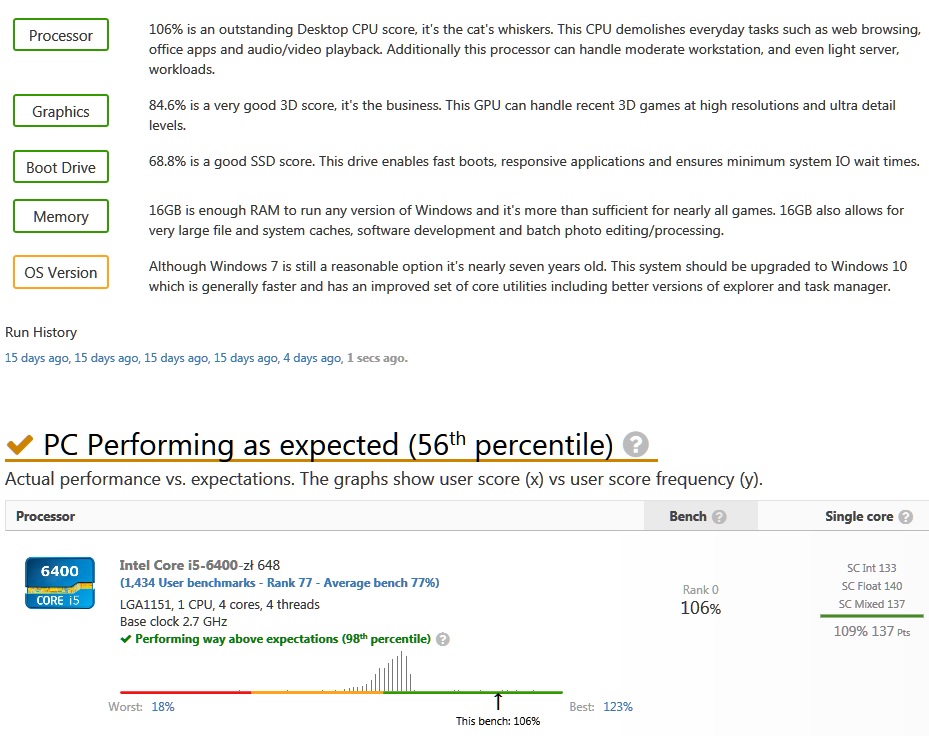
UserBenchmark can also predict your components’ performance. If it comes in below your expectations, look for hardware or software problems. Malware really can take a toll on benchmark scores. If you suspect malware is involved, scan your PC with anti-malware software like Malwarebytes Antimalware https://www.malwarebytes.org/. Conveniently, a free 14-day trial version is available.
- Optimizing Windows, and running cleanup and repairs after infections
Of course, gaining optimum PC performance for gaming comes down to more than just your hardware. In fact, every single application in your tray can put a drag on game performance – but especially IM’s with their huge graphical notifications. If you’re gaming on a low-end PC, closing IM’s is of utmost importance as the notifications can seriously restrain performance.
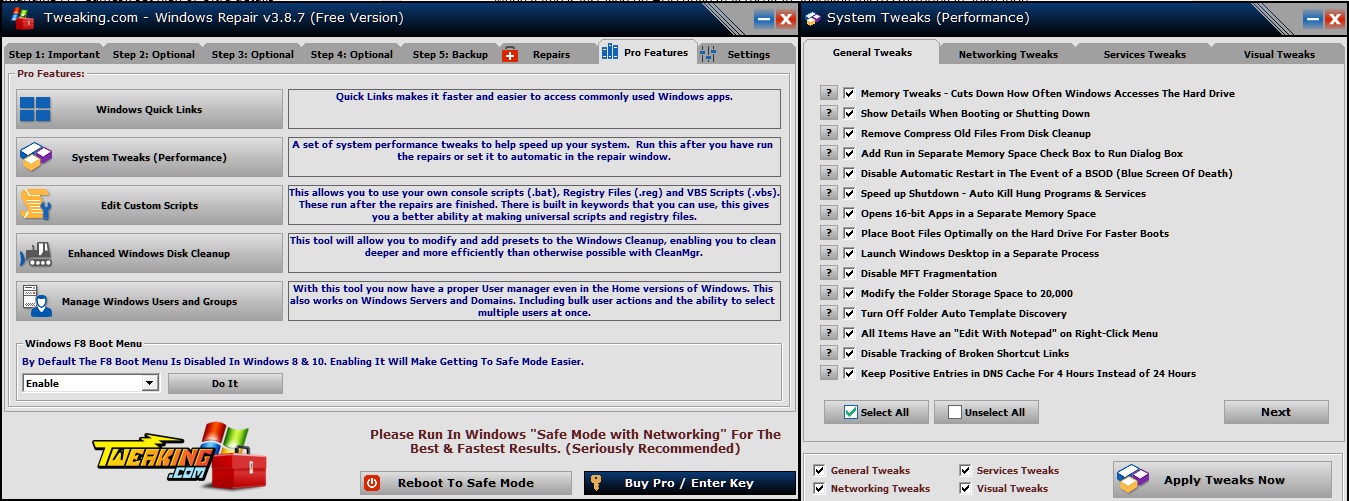
There are also many apps that optimize, cleanup and repair your Windows after it has been infected by a virus or malware. I recommend the extremely powerful Tweaking.com Windows Repair tool available here: http://www.tweaking.com/content/page/windows_repair_all_in_one.html
If you want to use it, remember to back up your Windows registry first and, if possible, create a “System restore” point. The Tweaking.com Windows Repair tool should be launched in “Windows Safe-Mode with Networking”. It can also apply a lot of general, network, service and visual performance tweaks to your Windows. There are also many repair scripts if your Windows is in bad shape. But remember, use caution and be reasonable!